Mostly Recipes, Sometimes News, Occasionally a Letter or Postcard.
Cooking with Crosby Roamann: Feta Cheese Toast


Feta Cheese Toast
- Tablespoon butter
- 4-6 slices good bread, about ½ inch thick, toasted
- 4-6 slices good prosciutto
- Garlic powder to taste
- Maldon sea salt to taste
- Cracked fresh pepper to taste
- Ground cumin pinch to taste
- Dry oregano or fresh garnish to taste
- 2 tablespoons Olio Nuovo or good olive oil
- Leftover crumbled Feta cheese, about 4 oz.
Prep
- Place 1 tablespoon butter on a large plate and microwave on high for 40 seconds
- Meanwhile, toast 4-6 pieces of good bread, like a sourdough boule.
- Place the toast in the butter and sprinkle a pinch of garlic salt on them, then flip them over, and place a piece of prosciutto on each slice of toast, tucking the edges of the prosciutto under the bread.
- Layer on your crumbled Feta cheese generously.
- Sprinkle the tops with Maldon Sea Salt, cracked fresh pepper, a touch of ground cumin (just a little pinch!) and a touch of dry (we used fresh) oregano (use a little more if you want a garnish).
- Then drizzle your best olive oil (we used our Olio Nuovo from 2023) generously over the tops of the toast – about 2 tablespoons worth.
Et voila! Feta Cheese Toast. We paired this with our Tuna Puttanesca, pictured below, and a bottle of good old Merlot. What I love about these little dishes is that I had everything I needed to make them at home. They are so simple and delicious and comforting and we didn't even have to go grocery shopping for anything! Did you know, "Puttanesca translates as “in the style of the whore.” The name derives from the Italian word puttana which means whore. Puttana in turn arises from the Latin word putida which means stinking." But boy, what a dish! xo

Cooking with Crosby Roamann: West Coast Style Gefilte Fish

There is one common staple in our house over Passover, and that is gefilte fish. Traditionally, I make enough for everyone, and then am the only one to eat it. But that’s ok. These things take time. I didn’t love, or even like, or even try, gefilte fish when I was a kid either.
When we lived in NY, it was easy enough to purchase really good gefilte from one of our local grocers, but here in wine country – no such luck. So, I took to making it myself from scratch when we moved here. The first versions weren’t very good -- it turned out to be nearly impossible to find the traditional fish in the right quantities in California. So, I adapted.
Our recipe is a “west coast” adaptation of the basic gefilte recipe from the great book The Gefilte Manifesto. All of the ingredients are easy to find at almost any good fishmonger and grocer this time of year.
Enjoy, and happy pesach.
West Coast Style Gefilte Fish
For the fish stock
- 1 lb spine and head, Halibut bones
- 4 qts water
- 1 Tbsp kosher salt
- 2 small onions
- 4 medium whole carrots
- 3 Tbsp sugar
Add all ingredients and simmer for 45 minutes. Strain the stock and remove the carrots, cutting them into 1” pieces and set ting them aside. Discard the remaining solids and return the stock to the stove top.

For the Gefilte Quenelles
- 1 lb California or Canadian Halibut fillet, skinned
- 1 lb California Sturgeon fillet, skinned
- 2 small onions
- 2 small eggs
- 2 Tbsp vegetable oil
- 2 Tbsp chopped fresh dill (plus more fresh sprigs for garnish set aside)
- 2 Tbsp sugar
- 1 Tbsp kosher salt
- ¼ tspn fresh ground black pepper
- ¼ cup Matzah meal
- Horseradish, fresh, for serving.
Prep
- Grind the onions, then the fish with it, and then all the remaining ingredients in a food processor. Remove the Gefilte mix to a bowl, cover and refrigerate for 30 minutes.
- Begin to reheat the stock on low. It should be warm, not hot/cold.
- Wet your hands, and roll out large egg-shaped quenelles, just smaller than a tennis ball. Place them gently in the stock using a slotted spoon, one by one.
- You should have about 12-14 quenelles, depending on size.
- Cover and boil the stock and quenelles on medium high for 30 minutes. Then let cool slightly.
- Line a serving dish with carrots and quenelles, then cover with stock, and garnish with a few fresh sprigs of dill, then wrap tightly with plastic and refrigerate. The quenelles are served cool, best the next day and for 3 days after.
- Serve with fresh horseradish and matzah for Passover.
Prepared Horseradish garnish recipe:
- 1 (8 to 10-inch long) piece horseradish root (4 to 5 ounces)
- 2 tablespoons water, more as needed
- 1 tablespoon white vinegar, more as needed
- Pinch salt
Peel and chop your horseradish root into half inch cubes, then pulse in a sturdy food processor with the other ingredients. Store in the refrigerator for up to 3 weeks (or as long as it takes to finish all the gefilte fish the rest of your family refused to eat.)
Cooking with Crosby Roamann: Seared Herb-Crusted NY Strip Steak with BA.1 Steak Sauce
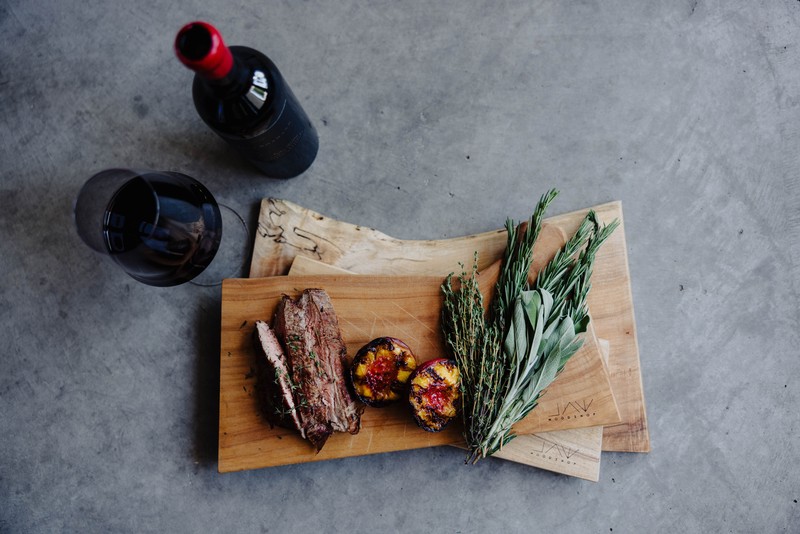
For our herb-crusted NY Strip Steak, we choose prime cuts at least 1-inch think, and apply a rub of 1 tablespoon each dried thyme, rosemary, oregano, and Kosher Salt. We let these sit for the day in the fridge, and then for an hour at room temperature before cooking. We prefer cast iron skillets for searing steaks at home, with one tablespoon of butter and a tablespoon of good olive oil, which we let begin to smoke in the skillet before we add the steaks. We fry these at the highest temperature we can for 3-4 minutes per side, and then finish them in the oven, covered for 2-4 minutes, until an instant read thermomemter registers 145F interior temp. We then let the steaks rest on a wood cutting board for 5 minutes before serving.
Pair this with our 2020 Crosby's Reserve Cabernet Sauvignon, available here.
- 2 Tbsp. balsamic vinegar
- 2 Tbsp. Worcestershire sauce
- 2 Tbsp. ketchup
- 1 Tbsp. extra-virgin olive oil
- 1 Tbsp. vinegar-based hot sauce (such as Frank’s or Crystal)
- 1 tsp. Dijon mustard
- 1 tsp. honey
- Kosher salt
Combine ingredients in a small bowl and mix well. BA says, "sauce can be made 2 months ahead. Store airtight at room temperature," but we store ours in the fridge.
Cooking with Crosby Roamann: Roast Chicken with Olives

It’s probably our favorite meal in the world … so there, I said it. No trip to Paris is complete for our family if we don’t visit Restaurant Allard, Alain Ducasse’s staple bistro near the heart of Saint-Germain-de-Pres. We’ve spent years trying to recreate the dishes we found there, and while it will never be exactly the same as sitting in the back of their small Parisian dining room and enjoying truly fine French bistro, it comes darn close. Enjoy this Roast Chicken (or Duck) with olives with our Thanksgiving selections or a magnum of Merlot. (The bird pictured here is with some late harvest zucchini form our garden while the olives finished cooking in their gravy).
- 2 tablespoons rendered chicken fat (or substitute 1 tablespoon oil and 1 tablespoon butter).
- 2 pounds chicken wings or backs, cut up.
- 1 chicken or duck (about 4 pounds, well-rinsed, patted dry, and trussed with neck and gizzard reserved.)
- 3 onions minced
- 1 1/2 tablespoons superfine flour
- 2 cups dry white wine
- 2 quarts chicken stock
- 1 bouquet garni: 12 parsley stems, 8 peppercorns, 1/4 teaspoon thyme, 1/4 teaspoon fennel seed and 1 bay leaf tied in a double thickness of cheesecloth.
- 1/3 cup tomato paste
- 8 ounces, brine-cured, pitted green olives
- 2 tablespoons unsalted butter, softened
In a large, nonreactive stockpot or stovetop casserole, melt the chicken fat over medium heat. Add the chicken pieces and reserved duck neck and gizzard. Cook, stirring over medium-high heat, until golden, about 8 minutes. Add the onions and cook until softened, about 5 minutes. Sprinkle on the flour and cook, stirring, for 1 minute. Stir in the wine, stock, bouquet garni, and tomato paste. Simmer, uncovered, over low heat for 2 hours, stirring occasionally. Strain the sauce through a fine mesh sieve into a nonreactive saucepan. Discard the solids.
Bring 1 quart of water to a boil in a medium saucepan. Add olives and boil over high heat for 2 minutes. Drain and rinse well under cold water. Taste an olive. If they are still very salty, repeat the blanching. Add the olives to the strained sauce. Set over low heat and simmer, uncovered, until the sauce is just thick enough to coat a spoon, about one to one-and-a-half hours.
Preheat the oven to 425 degrees.
Pierce the chicken or duck skin all over with a knife and rub the skin with the butter. Place the bird, breast side down, on a rack in a roasting pan and roast for 30 minutes. Reduce the oven temperature to 350 degrees. Turn the chicken or duck breast side up. Continue to roast the bird until the juices run clear when you pierce the thigh with a skewer, about one hour more. If you find that the breast is brown before the bird is cooked through, shield the breast by covering it loosely with aluminum foil.
To serve, carve the bird. Arrange the meat on a large serving platter and surround it with the green olives and sauce. Yield: 4 servings.
Cooking with Crosby Roamann: Juliana's Purple Plum Torte

If you have ever been invited over to our house in late August or early September, or if you've invited me to your home for a meal during this same time frame and asked me to bring dessert, you have probably eaten this cake! This is my all-time favorite recipe from Deb Perelman of Smitten Kitchen fame. I love Italian plums and this cake could not be easier or more delicious. What truly sets this apart is the last minute step of fresh squeezed lemon on top of the sliced plums, followed by a sprinkling of cinnamon and sugar before it goes into the oven. When Italian plums are in season, do yourself a favor and make this for yourself, and maybe share with people you truly care about, and only them.

Cooking with Crosby Roamann: Duck a la Sean -- Seared Duck Breast with Cherries
There is something about seared duck that always seems so … decadent. But what I love about duck is how simple and easy it can be, whether we simply take a couple duck confit and crisp them gently in the broiler with some boiled potatoes and a green salad for Sunday brunch, or sear up some duck breasts in a sauté pan for a somewhat more formal dinner. This recipe falls into the latter category. It has all the hallmarks of fine French cooking, but while it is exceptionally decadent and serious, it also incredibly simple. Only a couple ingredients are needed, and the majority of the prep time is spent halving and pitting cherries, half of which get eaten by whoever is chopping or talking with me in the kitchen (you know who you are!).
This is also a terribly romantic meal, and sure to impress, with a minimum of tedium. Enjoy!

Ingredients (Serves four)
- 4 Duck breasts, about 1 pound each
- Kosher salt
- Olive oil for searing the duck breasts.
For the spice rub:
- 1 heaping teaspoon plus of freshly ground pepper (black or rainbow, I prefer rainbow)
- 1 ½ teaspoons ground allspice
- 6 crushed cloves
- ½ heaping teaspoon fennel seeds
- 1 teaspoon ground ginger
For the Cherry Sauce:
- ½ cup turbinado sugar
- ½ cup red wine vinegar
- 1 cup good red wine
- 1 cup chicken broth
- Pinch of Cayenne
- Kosher salt
- 4 tablespoons butter
- 1 pound ripe red cherries, halved and pitted by hand
- 2 tablespoons granulated sugar, like baker’s sugar
- 1 tablespoon Kirsch

Preparation
Trim excess fat from the folds of the duck skin and discard. Score the skin of the duck breasts with three 1” strips at a diagonal set 1” apart, careful not to pierce the tender meat beneath the fat. Season the duck breasts generously with Kosher salt, then evenly sprinkly the Spice Rub mixture to each top and bottom of each duck breast. Use your fingers to work the spice rub into the meat. Wrap the duck breasts in plastic and set them in the refrigerator for the balance of the day (it’s best to do this in the morning of the day you plan to cook them) -- The spice rub will infuse the duck breasts with a wonderfully gingery and tangy flavor.
Prep the sauce: Melt the turbinado sugar in red wine vinegar over medium heat, stirring continually, about 4 minutes. Add the red wine, and bring it to a boil. When the wine begins to boil, reduce the heat to medium and gently cook off the alcohol – you’ll be able to smell it when the alcohol is gone – then add the chicken broth and return the sauce to a boil. Add the ginger, pepper, and a light touch of salt, reduce the heat, and stir over a simmer for five minutes or so more. This is the sauce base, and can be set aside until you are ready to cook the cherries.
Now it’s time to prep (and snack on!) those delicious cherries. This is a good time to open a bottle of Pinot Noir and discuss the day’s events while you prep – you can find one here from Crosby Roamann – and remove the duck breasts from the fridge, unwrap them, and set them aside. For the sauce, we like to use cherries from our two cherry trees – one is a golden yellow with red highlights, and the other is a deep red – but the dish is really better with sweet red cherries from the market. Halve the cherries and pit them with a sharp paring knife, then set aside.

Melt the butter in a wide saucepan, add the sugar, and let the sugar dissolve, then add the cherries and bring this all together over high heat, stirring every minute or so. The cherries will start to break down and release their juice. When they do so, carefully add the shot of Kirsch, boil it all for one more minute, stir the sauce to bring it all together, and remove from the heat. Keep the sauce warm on the stovetop while you fire the duck breasts. (If the cherries are still too tough, you can add them back for another couple minutes on the stovetop when the duck is resting.)
Now it’s time to sear the duck and assemble your feast. In a large sauté pan with a tablespoon of olive oil over medium high heat, sear the duck breasts skin side down for about 7 minutes (you may have to work in batches, depending on the size of the duck breasts and the size of the sauté pan). Flip the breasts and continue to sear another 5 minutes. The duck should have a deeply golden-brown hue. You will know the duck is just ready when the meat shows signs of juicing into the pan. Remove from the heat and let the duck rest for 5 minutes. Then slice the duck breasts on a diagonal, cover with the warm cherry sauce, and serve.
Bon appetit!
Serving recommendation: Allard Potatoes or Fancy White Mashed Potatoes, Seared Tarragony String Beans.
Wine Pairing: Napa Valley Merlot or Sonoma Coast Pinot Noir.
Inspired by: David Tanis for The New York Times, “Dining & Wine: Recipes – Duck With Cherries and Red Wine Vinegar” downloaded June 11, 2014 at 3:40pm.
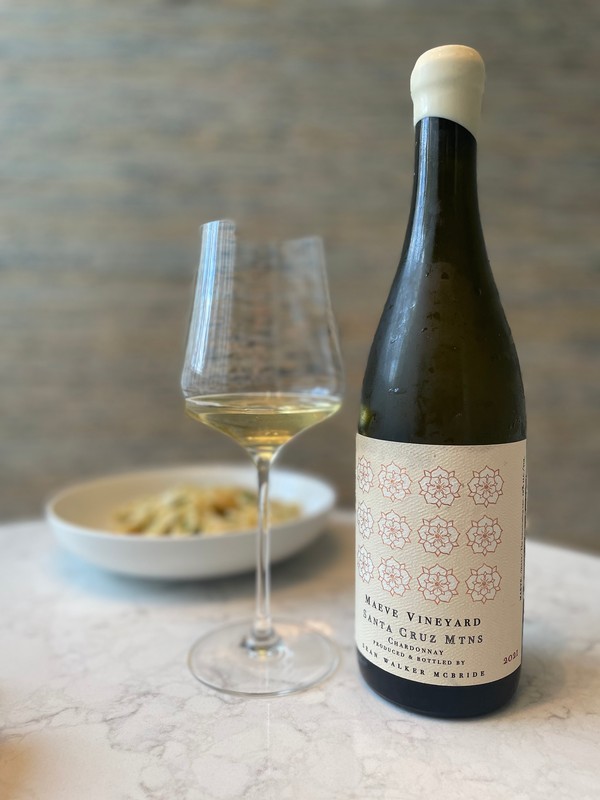
Cooking with Crosby Roamann: Farfalle with Creamy Smoked Salmon, Fresh Peas, and Dill
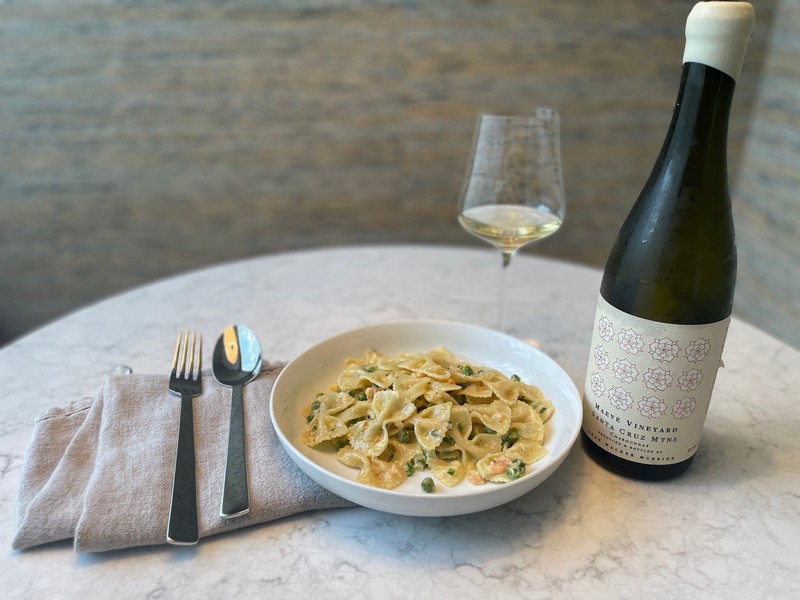
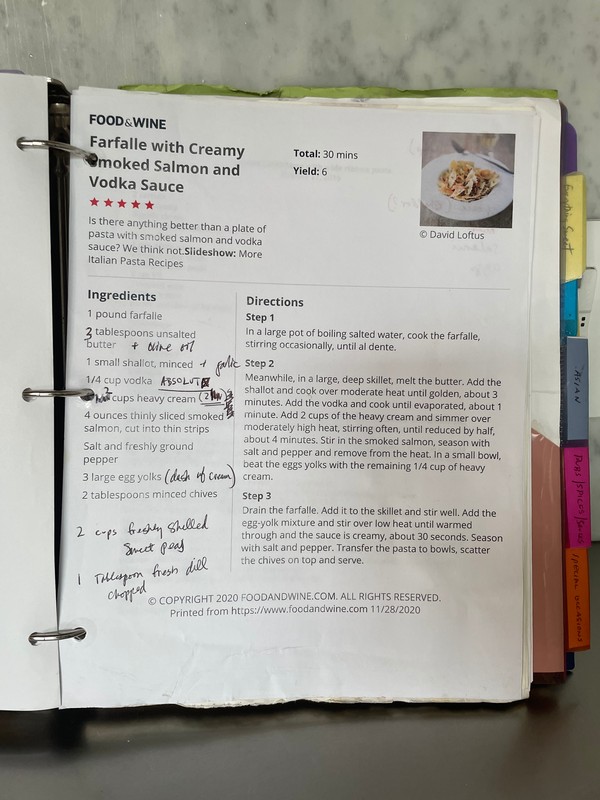
It's the perfect time of year for these fresh spring pasta recipes, doctored with ingredients fresh from the garden. This only-very-lightly-creamy pasta dish pairs so deliciously with our Maeve Vineyard Chardonnay from the Santa Cruz Mountains, and it was a perfect base recipe to add some fresh peas and wild dill from our garden. The inspiration came from an old recipe in Food & Wine Magazine (pictured) to which we added a couple ingredients and updated the proportions a little bit.
Ingredients:
- 1 pound farfalle
- 3 tablespoons butter, cut into 1 tablespoon chunks
- 2 tablespoons olive oil
- 1 small shallot, halved and sliced thinly
- 3 garlic cloves, chopped
- 1/4 cup ABSOLUT vodka
- 2 cups heavy cream (plus a dash for the eggs)*
- 4 ounces smoked salmon, cut into 1" strips
- 2 cups freshly shelled sweet peas
- 1 tablespoon fresh dill, chopped
- 3 large egg yolks (plus a dash of cream)
- 2 tablespoons fresh chives, chopped into tiny pieces
- Maldon sea salt and frehsly ground red/black/green peppers to taste
* We don't keep fresh cream in the house on an everyday basis, and we don't cook with it often enough to have any use for left over heavy cream, so this is admittedly a terribly annoying amount of cream to have to purchase for this dish and then not to use. So we just purchase a pint of heavy cream and then set aside a dash to add to the eggs in order to finish the sauce. And if you forget to add that dash to the eggs and instead add it all to the cream sauce, well like so what? Just add the eggs to the pasta sauce at the very end as if you're making a carbonara.
Preparation:
- Melt the butter in the olive oil, don't let it brown.
- Add the shallots, give it a minute, then add the garlic. Season with a little Kosher salt. Let them sweat. Time for a glass of Chardonnay!
- Remove the sauce pan from the heat, carefully add the ABSOLUT**, then return it to a simmer. A sniff of boiling vodka won't hurt anyone :) It's delish!
- When the vodka has reduced by half, add the cream, and stir to consolidate. A little spring of fresh dill in the cream isn't a bad idea, just don't get carried away. How's that chardonnay tasting?
- Give that cream a chance to come up to a gentle simmer, and start to skim the solids into the sauce. It's a good time to add the peas, to let them soften as the cream condenses. Then add the rest of the fresh dill. In about five minutes of a gentle simmer, add the smoked salmon strips, and give them a couple minutes in the sauce to tighten up. Keep stirring everything together, then remove from the heat and set it aside.
- Immediately drain the pasta, and return it to its pot. Cover it with your cream sauce. Stir in your egg yolks, and let it all rest together for about five minutes. Then plate in shallow bowls, and enjoy
Serve with our Maeve Vineyard Chardonnay Santa Cruz Mountains 2021.
** ABSOLUT is our "absolute" favorite cooking vodka. We use it for every dish that calls for vodka. It's punchy enough to add a bit of flavor, but not so expensive we feel we're pouring money down the drain. ABSOLUT is a Kitchen Staple in our house.
Cooking with Crosby Roamann: Sushi with fresh wasabi from our garden

(Pictured: blue fin tuna nigiri with daikon radish, scallions, and fresh wasabi)
Yes, okay, so it took two plus years to grow, but I finally managed to harvest my own wasabi plants from roots purchased in Oregon in 2021. When they arrived in the mail, the wasabi roots were about an inch long and had a handful of small wasabi leaves growing on them. I planted them in an 18" trench planter filled with compost and potting mix in a shady spot along our fence line and put a water line on them for three times per week. At first, everything started to grow brilliantly, but that was mid-Spring. As the angle of the sun changed over the beginning of the summer the wasabi came into direct sunlight during the middle of the day, and that's when we lost the first two plants to dehydration.

Another two plants died a couple weeks later during a heatwave due actually to over-watering. At that point, I took the water line of the remaining wasabi root, which was still doing pretty well, and transfered the planter to the north side of the house, where it wouldn't receive any direct sunlight at all. Without the water line on it, I had to warer it manually once per week over the rest of the summer and into the wall. So that's the story of how you turn five good wasabi plants into one. By the time winter rolled around, our one wasabi remained and was doing pretty well.

Fast forward to May 2023, and our little wasabi box has survived two brutal summers and some benevolent neglect in the watering schedule. Our main root has spawned a number of smaller root systems in the box, and at harvest, the first job was to dig these all out by hand and separate them. The smaller roots balls will be replanted with fresh potting mix in the same box.

Step 2: Dinner! We trimmed the wasabi root down to one long root about nine inches, then peeled off the coarse outer skin. To prepare fresh wasabi, we use this sharkskin hand grater that we purchased in Tokyo.

We ground some daikon radish ("oshinko") from the Japanese market in San Francisco (Nijiya, click here) ...

and we thinly slice fresh scallions ...

and halve eight fresh scallops, without cutting all the way through, leaving one edge attached ...

To prepare our sushi rice, we use a rice steamer purchased from Nijiya (this was one of the best buys we ever made -- it turns out consistently delicious rice without any hassle and is easy to clean). Once the rice has finised cooking, we pour about 1/3 cup of Rice Vinegar (we prefer the fancy stuff from Nijiya, but any rice vinegar will do) and 1 tablespoon of Aji Mirin into the rice pot, we stir it up gently, and let it sit for 15 minutes. We leave the rice cooker on "warm" -- which is how we like to prep our sushi.
We rub a small dash of the freshly ground wasabi on each scallop and each piece of thinly sliced tuna, then we prep a small ball of rice -- about 1 tablespoon of seasoned rice -- rolling it in our left hand into a thumb-sized lump. We top this lump of rice with fish, and press it firmly into place using two fingers pressing the fish down into the rice ball in our left hand. From then, all we have to do is adjust and garnish the pieces of sushi.

(Pictured: lightly seared fresh hotate "scallop" nigiri with fresh wasabi, nori wrap, with Maldon sea salt and oshinko garnish.)
Cooking with Crosby Roamann: Pâté de Campagne – aka Country Pate
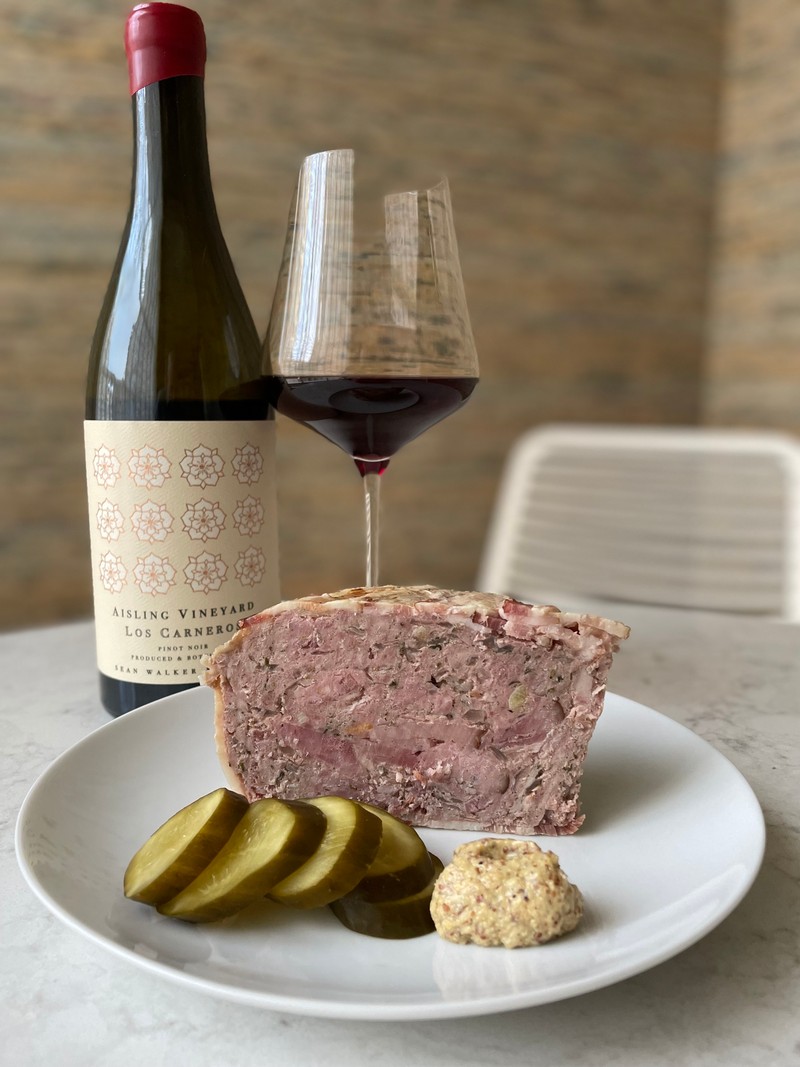
Cooking with Crosby Roamann: Pâté de Campagne – aka Country Pate
Ingredients
- ¾ cup Brandy (we use house made Crosby Roamann brandy – call us for info)
- 3 tablespoons unsalted butter
- 1 cup chopped onion
- 1 pound ground veal
- 1 pound ground pork
- 2 packages bacon (about 1.5 pounds) chopped into 1” pieces
- 5 garlic cloves, finely chopped
- 2 ½ teaspoons Kosher salt
- 2 ½ teaspoons dry thyme
- 2 teaspoons dry rosemary
- 1 teaspoon ground black pepper
- 2 large eggs, lightly beaten
- ½ cup heavy cream
- 1 small ham steak, cut into ¼-inch thin strips
Preparation
- Preheat the over to 350 degrees.
- Boil Brandy until reduced to 1/2 cup, about 2 minutes. Let it cool.
- Melt butter in a skillet over medium heat, then add onion, and later, the garlic, and saute until the onion is soft and translucent but not brown, about 10 minutes.
- While the onion and garlic are cooking, combine ground pork and bacon in large bowl using your fingers. When the onion has cooled a touch, add the onion salt, thyme, rosemary, and pepper to bowl with pork mixture and mix until incorporated. Add eggs, cream, and reduced Cognac. Mix well. You now have a big bowl of pate filling!
- Line a 9x5x3-inch metal loaf pan with bacon slices, arranging bacon slices across width of pan and a couple slices on each short side of pan and overlapping pan on all sides. Using hands, fill the terrine halfway with the meat filling, then arrange ham slices throughout the middle of the pan in a middle layer, then top with remaining meat mixture. I like to heap the meat filling into a mound on top of the pan, then cover it with the bacon slices that are hanging over the sides of the pan.
- Cover the pan tightly with foil and place it in a larger (13x9x2-inch) metal baking pan and transfer them to the oven. Pour boiling water into baking pan to come halfway up sides of loaf pan. Bake pâté about 2 hours 15 minutes.
- At the conclusion of baking, remove the pate pan from the baking pan and then dispose of the water from the baking pan. Return the pate pan to the baking pan, and place a heavy skillet filled with 2 to 3 heavy cans atop pâté to weigh down. Let this rest for an hour or so, until it has cooled. Then chill overnight.
- Place loaf pan with pâté in larger pan of hot water for about 3 minutes. Invert pâté onto platter; discard fat from platter and wipe clean. Cut pâté crosswise into 1/2-inch slices.
- Serve with good bread, cornichons and country Dijon mustard. Enjoy!
(Adapted from Bon Appetit Magazine)
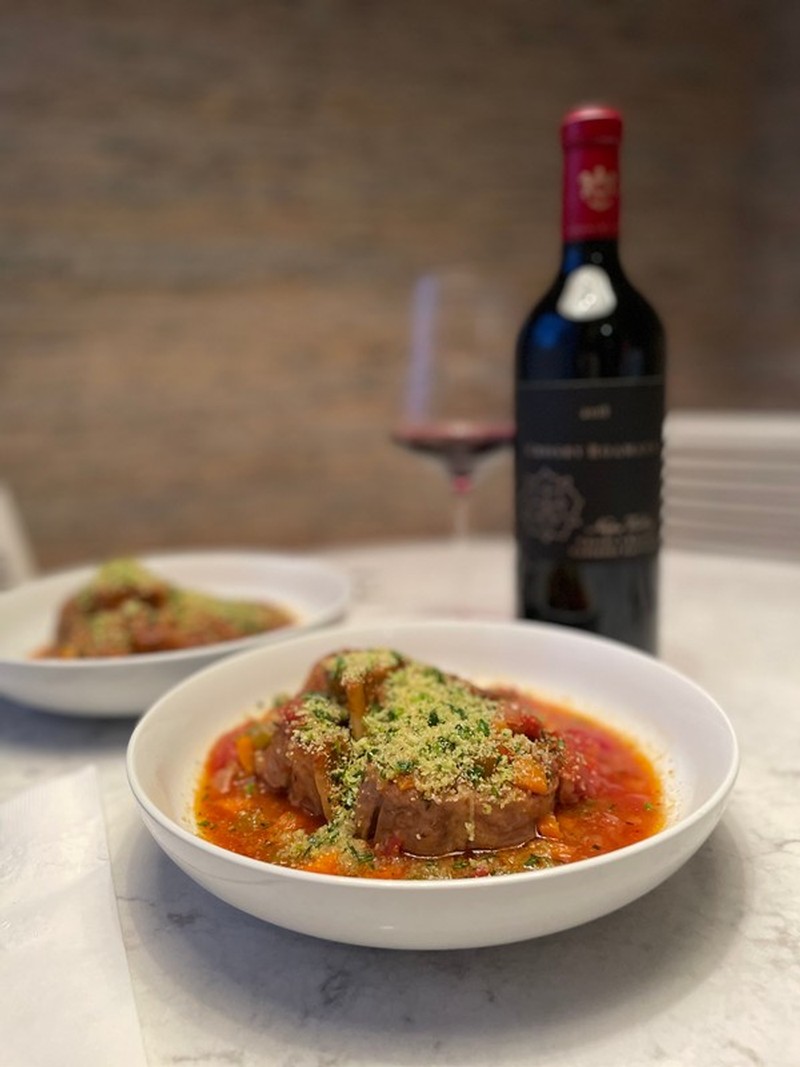
Cooking with Crosby Roamann: Osso Buco

Cooking with Crosby Roamann: Osso Buco
Osso Buco (translated "bone with a hole") has been one of my favorite dishes since we first tasted this sumptuous dish at the Mario Batali West Village staple Babbo in the early 2000s. It's perfect in the early spring when it's still a little too cold for warmer pasta sauces and I'm in the mood for something hearty -- plus, the veal is in season. Personally, we like to dress this down and serve this dish with butter noodles or simply a good, crusty bread. You will want a small spoon to dig the bone marrow out, and I suggest eating it with a slice of crispy bread first, then digging into the main course. Enjoy!
Ingredients
- 6 tablespoons olive oil
- 2 tablespoons unsalted butter
- 4 portions veal shank
- ½ cup flour
- 1 cup each chopped onions, carrots, celery
- 3 cloves garlic
- 1 ½ cups dry white wine (we use leftover Crosby Roamann Chardonnay)
- 1 can chopped tomatoes, or whole peeled tomatoes chopped with their juice
- 2 cups veal, beef or chicken stock
- 1 teaspoon dry thyme
- Freshly ground black pepper to taste
Preparation
- Preheat the oven to 350 degrees.
- Melt the butter in a large casserole (big enough to hold all the veal shanks side by side) with the olive oil over medium heat.
- Dredge the veal shanks in lightly salted flour then shake off the excess and sear them on all sides in the hot oil and butter, then set them aside, and reduce the heat.
- Add a little more olive oil if the casserole is dry, then add the onions, carrots, and celery and, after a couple minutes, the garlic too, and lightly brown everything, stirring it all together.
- Add the wine, and reduce by a quarter. When the smell of alcohol has evaporated, add the tomatoes and juice and seasoning thyme and bring it back to a light boil. When it begins to boil again, add the stock, and return it to a light boil.
- Add the veal shanks, and baste with the sauce – about five minutes. At this point, cover the casserole and transition it to the preheated over to bake for about 1.5 hours. Baste several times during this time.
- When you are ready to serve, plate each veal shank in a shallow bowl, and add enough sauce to cover the veal shank about halfway. Sprinkle the veal and sauce with Gremolata topping (recipe below), and serve warm.
Gremolata (topping/garnish) a mixture of:
- 1 large garlic clove, very finely minced
- Grated rind of one lemon
- ¼ cup finely chopped parsley
- ¼ cup fine breadcrumbs
Adapted from Florence Fabricant – NY Times Cooking