Cooking with Crosby Roamann: Sourdough Baguettes
Every other week or so as I prepare our weekend bread, I decide to alter the recipe just a little bit, and more often than not, that alteration simply leads to baguettes. They're a little more difficult to make, and a little more work, but they are delicious straight out of the oven, they store well for a day (if they even last that long) and they freeze very well wrapped in plastic wrap and defrost easily, extending the amount of time you can enjoy them. The only slight complication is that you will need a baguette pan to make them – but you can find one HERE.
The other consideration when we are making baguettes is the flour. I am one of the roughly 35% of the US population with a gene variant that prevents my body from methylating Folic Acid (a common ingredient in "enriched" flour). From Gemini: "It's estimated that up to 50% of people may have a genetic variant, specifically a polymorphism in the MTHFR gene, that reduces their ability to convert folic acid (the synthetic form of folate) to its active form, L-methylfolate. This can affect their ability to properly absorb and utilize folic acid, including that found in fortified bread."
My problem is that when I ingest products that are "enriched" with Folic Acid, I feel kind of disgusting -- bloated, gassy, etc. TMI? Sorry!
I've found that it's really rather common for people with this gene variant to complain about how they feel after eating domestically produced bread and pasta (the pasta! ugh...) but then when they go to ITALY, it's a totally different story. In Italy, I am told, the wheat -- how it is grown and produced and packaged -- is all totally different, and it doesn't contain Folic Acid. Maybe you’re like me, maybe not, but I could eat pizza and pasta every day in Italy and not feel sick...well, not as sick, or sick but just in a different way, like from over-eating because it's so good
So with all that in mind, I have been looking for a way to incorporate a similarly healthy flour ingredient into my baking and pasta-making. Something that I can enjoy without feeling guilty and sick about ingesting all that gluten.
Enter – organic flour. I have been rotating three different types of flour in our kitchen for our breads in general. The first is Bob's Red Mill Organic Unbleached All-Purpose White Flour. I have had very good results with this bread, and I’ve never felt “kind-of-off” after eating it. The texture of the dough when mixed with the yeast starter and water has a good texture that is easy to mold and the flavor is fantastic.
We’ve also used Bob’s Red Mill Unbleached Enriched Bread Flour – the trade off here being that is, in fact, BREAD flour, not-all purpose flour, but it is NOT organic, it is enriched. For whatever reason, I have had slightly less good results with this flour – I’m really not sure why.
The other flour really worth a try, however, is the King Arthur Organic Bread Flour. On the surface of it, this should be the perfect product. The only problem is, again – for whatever reason, and I’m really not sure what it is – I just don’t love the texture of the dough this makes as it is formed, and I’m not sure I get the same flavor or texture out of the dough. So, I keep coming back to the Red Mill Organic All Purpose Flour. That being said, the differences are fairly minor, and you will get remarkable results with this recipe with any of these ingredients.
Ingredients:
100g sourdough starter from the fridge (GO HERE for your sourdough starter recipe)
385g very warm water (we use about 110-120F tap water)
520g (organic) bread flour (plus a large pinch for rolling out and shaping baguettes)
12g Kosher salt
Directions:
The night before you plan to bake –
Combine all the ingredients in a large bowl and combine until you form a shaggy dough. The dough will stick to the spoon, your fingers, the bowl – everything. That’s ok! Run a little warm water in the sink and using wet fingers, gently pinch off the sticky dough from the spoon, then wet the spoon, and gently scrape the dough off the sides of the bowl. Combine all the dough in one heap in the middle of the bowl. Using a wet paper towl, wipe down the sides of the bowl – mostly just to clean it up a little bit. Then drape a moist kitchen towel over the bowl of dough and set it aside for 30 minutes.
After 30 minutes, you’re going to perform your first “turn” of the dough. Run some cool water and wet the fingers on your dominant hand. Using your finger tips and wet fingers, scrape the sides of the dough down from the bowl. When the sides of the dough have been released from the bowl, wet your fingers and scrape up the bottom of the dough from the bottom of the bowl.
Once the dough is fully released from sticking to the bowl, grasp one side of the dough and pull it straight up about 12-18 inches with your dominant hand, then fold it over the other side.
Rotate the bowl 90 degrees, grasp the thick fold of the dough that you just created by folding it over itself, and once again raise it up 12-18 inches and fold it over itself.
Repeat this process 1 or 2 more times, until you are satisfied that the dough has been fully folded.
The folding process will lengthen and strengthen the glutens in your bread, forming a texture within which the sourdough fermentation process can create lots of little, and some large bubbles, forming the ultimate structure of your bread.
Set a timer for another 20-30 minutes (whatever your schedule will allow) and repeat the entire process one more time. If you’re feeling extra frisky, you can even perform a third turning after another 20-30 minute rest.
At the conclusion of the folding process, cover your bread-dough bowl with a damp kitchen towel and find a nice little quiet and out of the way place for it to rise overnight.
In the morning, your dough is going to look like this:
Unlike our sourdough boule, to make baguettes, we’re going to lightly flour a clean and dry workspace (I like to use a large wooden cutting board, turned upside down).
Once again, run some cool water in the sink, and wet the fingers on your dominant hand.
Once again, using your fingertips – scrape down the bread off the sides of the bowl and gently release it from the bottom of the bowl.
Then gently tip the dough out of the bowl and allow it to fall upside down on the floured work space.
Sprinkle more dough over the top (what was once the bottom) of the dough.
Cut the bread directly in half, and scrape any wet dough off the knife back onto one side of the dough, like so …
Flatten the dough into a 1/2 inch thick and 4 inch by 8 inch rectangle, like this …
Then fold one inch up …
and one inch down like so …
Then fold once more, away from you, in half, to make a 1-2 inch wide rectangle.
Roll the dough away from you one-quarter turn, so the “seam” (i.e., the gap between the folded sides) is now on the bottom, and you have a nice fluffy looking baguette shape, like this …
Using both hands, gently roll, shake, cajole, and pull the dough into your desired baguette shape, then transfer it to one side of your baguette pan and stretch it out to your desired length.
Repeat this process on baguette number two.
You now have two baguette doughs resting in the baguette pan. Let them rest. It’s been a long morning. Have some coffee! You’ve earned it. Cover them with your damp kitchen towel and set them aside for 30 minutes to an hour, depending on how spongy you want them when baked. Go walk the dog(s), or make the beds, hop in the shower, or go to the gym, whatever makes you happy. In about 60 minutes, however, you want to come back to those baguettes and you want to transfer them to the refrigerator, uncovered, to chill for 30-60 minutes. And that’s when you preheat the oven to 500F with one rack directly in the middle of the oven and another rack towards the bottom.
Back at 500F for 15 minutes with a small baking dish with 5-10 ice cubes to hydrate the air in the oven.
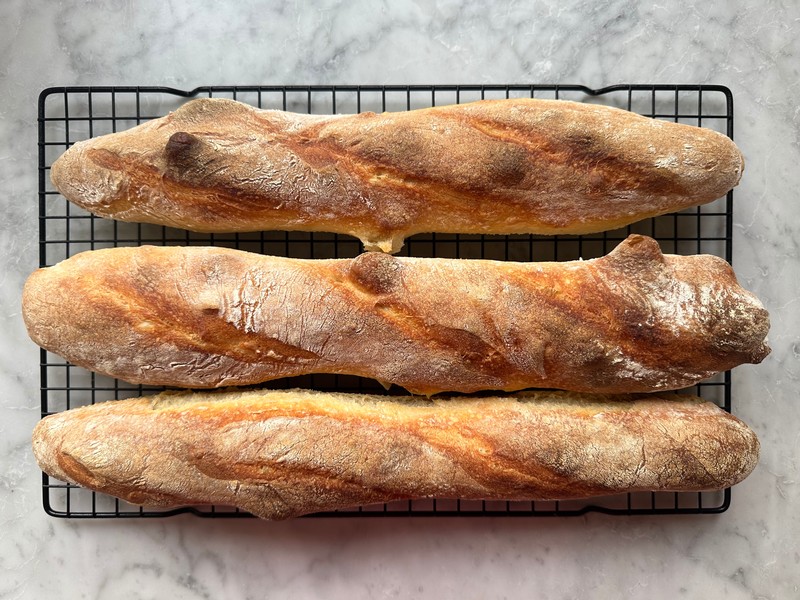
At the end of 15 minutes, turn the temperature down to 450 and bake for another 15 minutes. (If the crust isn’t quite golden brown enough for you at the conclusion of 30 minutes of baking, go ahead and try another 2-3 minutes at 450. Sometimes my own oven needs another 2-3 minutes of baking at 450F to get the crust on our baguettes just the way I like it, see picture.)